Blog
How to Configure Fanvil IP Phone

Configuring a Fanvil IP phone may seem daunting at first, but with the right steps, it becomes a straightforward process. Fanvil IP phones are known for their reliability and rich feature set, making them a popular choice for businesses of all sizes. This guide will walk you through the basic steps to get your Fanvil IP phone up and running.
Step 1: Unboxing and Connecting Your Phone
Before you start the configuration process, ensure you have all the necessary components:
- Fanvil IP phone
- Handset and handset cord
- Ethernet cable
- Power adapter (if not using Power over Ethernet, PoE)
Steps:
- Connect the handset to the phone: Plug the handset cord into the handset and the handset port on the side of the phone.
- Connect the phone to your network: Use the Ethernet cable to connect the LAN port of the phone to your network switch or router. If you are using PoE, this connection will also power the phone. Otherwise, connect the power adapter to the phone and plug it into an electrical outlet.
- Turn on the phone: If using a power adapter, press the power button (if available) to turn on the phone.
Step 2: Accessing the Phone’s Web Interface
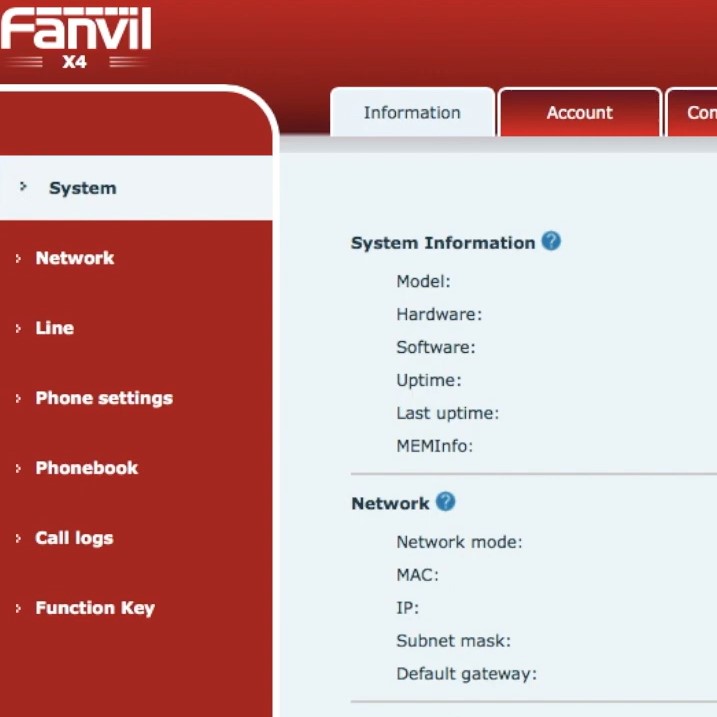
Fanvil IP phones can be configured via their web interface, which provides a user-friendly way to input all necessary settings.
Steps:
- Find the phone’s IP address: On the phone, press the “Menu” button, navigate to “Status” and select “Network”. Note down the IP address displayed.
- Access the web interface: Open a web browser on your computer and enter the phone’s IP address in the address bar.
- Log in: The default username and password are usually both “admin”. Enter these credentials to log in.
Step 3: Configuring the SIP Account
To make and receive calls, you need to configure your SIP (Session Initiation Protocol) account.
Steps:
- Navigate to SIP settings: Once logged in, go to the “Account” tab and select “SIP Account”.
- Enter account details: Input the following information as provided by your VoIP service provider:
- Account Active: Set to “Enabled”.
- Label: A name for this account (e.g., “Work Line”).
- Display Name: Your name or the name you want to appear on outgoing calls.
- Register Name: Your SIP username.
- User Name: Your SIP username.
- Password: Your SIP password.
- SIP Server: The server address of your VoIP provider.
- Save and apply settings: After entering all details, click “Save” and then “Apply”.
Step 4: Configuring Network Settings (Optional)
For advanced users, configuring network settings such as VLAN, QoS, or static IP addresses may be necessary.
Steps:
- Navigate to Network settings: Go to the “Network” tab in the web interface.
- Configure necessary settings: Depending on your network requirements, adjust the settings such as IP Configuration (DHCP/Static), VLAN, or QoS.
- Save and apply settings: After making changes, click “Save” and then “Apply”.
Step 5: Testing the Configuration
Once all settings are configured, it’s essential to test the phone to ensure it is working correctly.
Steps:
- Reboot the phone: This ensures all new settings are applied correctly. You can usually do this via the web interface under the “System” tab or by simply unplugging and reconnecting the power.
- Make a test call: Try dialing a known working number to check if the phone can make outbound calls.
- Receive a test call: Ask someone to call your SIP number to ensure the phone can receive inbound calls.
Troubleshooting
If you encounter any issues, consider the following tips:
- Double-check SIP credentials: Ensure all SIP account details are correctly entered.
- Check network connectivity: Ensure the phone is properly connected to the network and has internet access.
- Update firmware: Sometimes updating the phone’s firmware can resolve compatibility issues.
- Consult the user manual: Fanvil provides comprehensive user manuals for each phone model, which can be very helpful for troubleshooting specific issues.
Buy Most Popular Fanvil IP Phone from our store
